Here is a simple question you may have – does your coffee maker bring water to a boil before dripping over the grind to make coffee?
This may be a surprising answer but no, it doesn’t if you are using a regular drip coffee maker.
It gets close but doesn’t go all the way.
If you want to know how hot the water gets it usually around 200 degrees, a bit below boiling.
What is Boiling Water?
Let science answer this question. The difference between hot water and boiling water is a matter of temperature.
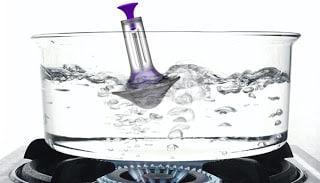
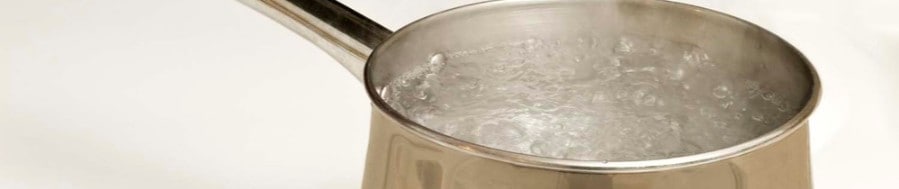
Boiling water refers to water that has reached a certain temperature – 100 degrees Celsius or 212 degrees Fahrenheit at sea level. At this temperature, water is exposed to enough heat to cause it to bubbles and create steam. Boiling water is often used to cook food.
Other use for boiling water is sterilization. Boiling water helps sterilize bottles used for canning, feeding bottles for babies and spoons and forks.
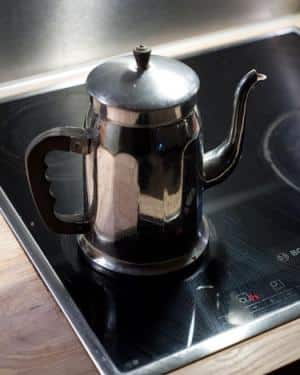
Basically the only coffee makers that can actually boil water are alternative heat source style coffee makers like The Farberware Yosemite or the Bialetti Moka Express, both of which are placed directly on a burner or over an open flame.
Percolators aren’t as trendy these days but moka pots are. You can see my favorite stainless steel moka pots here if you like.
Why Doesn’t A Coffee Maker Boil Water to Make Coffee
 First of all boiling water is never good for brewing coffee. Hence, it’s why coffee makers do not boil water.
Even in a percolator or a moka pot the steam from boiling water rises and condenses and it’s that that is what brews the coffee. If left unchecked the final brewed coffee can then start to boil and reduce down though so these devices are rarely left to brew coffee unattended.
See this post for details on reducing coffee after it’s been brewed.
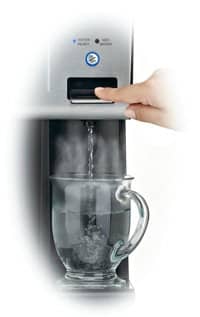
A lot of coffee pots these days come with a separate hot water reservoir & dispenser. In fact my wife bought me a decent coffee machine for Christmas back in 2011 and it had a hot water reservoir. She uses it for making hot tea in the morning.
I tested the hot water reservoir not long ago just to see what temp the water came out at. I measured around 190 degrees in my mug meaning that it was probably a pinch higher in the chamber under the heating element.
Many high end coffee makers report their brewing process brings the water temperature up to 200 degrees (the ideal temp for brewing coffee) but even that is 12 degrees under that of boiling water.
For a coffee maker to boil the water the element would have to turn all the water to steam and this is something that they are just not designed to do. To trap that steam and maintain temperature would require engineering a new kind of device, a pressure cooker for coffee so-to-speak.
What is the Perfect Water Temperature for Coffee Makers
Keurig brewers heat up water up to 192°F. This is a few degrees less than the range suggested by the National Coffee Association. But, the company noted that it is the optimal temperature for brewing coffee, cocoa and, tea.
Hula Daddy shared a survey by Consumer Reports and Cooks Illustrated that reviewed coffee makers’ temperature and that most brand new coffee makers have showcase the prescribed water temperature range of 195°F to 205°F.
If you own a new coffee maker, it’s water temperature when brewing is guaranteed to be within the range. But, what if you own an old coffee maker? Say, you bought it last year and you have used it almost everyday. Will it still have the same water temperature?
We have tested a number of used coffee makers and found that after a few months that the brewing temperature drops drastically. One popular used coffeemaker we tested was brewing coffee at 156 F.
Why is There a Prescribed Temperature?
The Kitchn suggested, “195°F to 205°F is the range where water-soluble flavor compounds most easily dissolve in water”.
Cafes maintain this temperature when preparing their coffee. That’s to-go coffee has that just-right temperature and we try to recreate it at home with the help of a coffee maker.
If you are going to spend the time, energy and most importantly, money on making good coffee at home, these parameters are vital to your success based on the scientific research that the SCAA as well as several other foundations have conducted.
All the SCAA certified coffee makers are made to high standards and they all will maintain the highest optimal water temperature at brew time. Of them all I personally like the Cuisinart CPO-850 the best because it is one of the lowest price SCAA certified machines, meaning it is the best value for a top-performing brewer.
What Would Happen if Coffee Makers Used Boiling Water
You could still use boiling water for brewing coffee but it wont yield a good tasting cup. If you were to use boiling water on a stovetop for instance this is what you would notice:
Boiling water burns coffee grounds. High heat burns the coffee grounds and make it taste bitter. This is the real reason why you don’t get the temp all the way to boiling.
How can you Control the Temperature?
There are temperature controlled kettles. But your best partner is a kitchen thermometer.
If you are using a coffee maker, it has a built in water heater and control. Most brewers have thermocouples. Thermocouples are mechanical parts. Over several usage, they tend to wear out. That’s why you still need to check the temperature of the brewer, especially if you had been using it for a long time.
An indicator of a damaged thermocouple is a change in the taste of your brewed coffee. It tends to be sour, it’s time to get a new brewer. The thermocouple is not achieving the desired temperature. As a result, the brewed coffee is “underbrewed”.
Don’t make the mistake adding more ground coffee to mask the taste. A new brewer will serve you better.
If you are using a Chemex or a French Press, heat up the container before using it. Add hot water and let it sit for a few seconds. It will warm up the container and maintain the temperature of the water when you start to brew.
Here are Some Other Reasons Why Your Coffee Maker Hot Water Heater Doesn’t Go Up to Boiling
Out of curiosity I actually went to my stove and started boiling water. During the full boil I picked the pan up and poured the water out into my mug and measured it at 195.
How is that possible I thought. Seems the first bit of temp drops pretty quick when removed from the heat source. It also appears that altitude affects the temperature of boiling water a lot more that I realized in the first place too!
At 4000 feet for instance (like me) water boils at only 204 degrees! If you are at a higher altitude water boils at a lower temperature. Add in the heat loss from removing the water from the heating element and temperature drops quickly.
The problem of heat loss can be mitigated by preheating the cup or pot you are pouring the hot water into but on the other end of the spectrum 212 degree water from a coffee maker is really unlikely because that is the boiling point of water at sea level. As the altitude goes up the boiling point drops. This is another reason why pressure cookers work so well. The increase in pressure actually increases the boiling point of water allowing it to get much hotter than it could under normal circumstances.
So, can you use a coffee pot to boil water?
 Yeah, for all basic needs the water coming out of a coffee maker is probably going to be a bit below the temperature of boiling water from your stove or a flame. But then again it’s not likely to be low enough to hinder what you are up to.
If you truly need boiling water 200-212 degree water I suggest using a stove top pan but if 185-190 degree water is fine for your needs then most quality coffee machines will do just fine. Just make sure to clean the pot real good if you want to minimize your chances of getting any residual coffee flavor in your water as it passes through an empty coffee filter basket.
Can You Boil Water With A Coffee Maker?
 Why don’t our coffee makers boil water? The question might seem mundane or silly at first but there’s actually a good reason.
If you too are on the hunt for the perfect cup of coffee then temperature is a crucial stepping stone.
Higher the temp, better results, right?
Wrong
Stop immediately. If you’ve been boiling water and adding it straight to your coffee grounds you’re not properly brewing.
Coffee isn’t immune to being burned
The ideal temperature for making coffee is 195-205 degrees Fahrenheit.
This is what your coffee maker is aiming for.
This allows for the optimum extraction from coffee grounds or beans. And you want your morning coffee as optimum as possible.
The water in your coffee maker has to be hot enough to extract oils and flavor from the coffee but not ruin the taste.
Now it’s easy to see:
Colder water will result in flat, under-extracted coffee, while water that is too hot will also cause a loss of quality.
However, actually drinking your brew requires a different temperature.
Studies have shown that coffee drinkers typically drink their coffee at 140 degrees Fahrenheit or below.
When You’ll Need Boiling Water
Let’s say you want to do some cleaning. Well, a coffee maker isn’t your best bet.
Far from it.
Even cleaning your coffee pot itself requires boiling water from a proper source.
When You’ll Need Boiling Water:
- Sterilization
- Making water potable for drinking
- Cooking
- It doesn’t take long for boiling water to drop to the best temperature for making coffee either. Just leave standing for a minute or two
You’ll really want to clean your coffee machine before you use it for anything else anyway.
The flavor of coffee is quite strong and most water containers will hold some of it and taint the taste of whatever else you’re going to use the water for.
Although your coffee maker might cook sub-par ramen, it’s destined to taste like your last carafe.
Don’t Have A Coffee Maker?
Maybe you’ve just moved out from under your parents roof, or you’re simply trying to experiment for the best results.
Follow the steps below for a great cup of coffee, sans automated coffee pot.
First, check out your tap water.
Taste too chlorinated? Then you’ll find bottled or purified water to be ideal.
Make your selection of coffee grounds based on your personal preference, but don’t be afraid to do some research to find what suits you.
There’s a whole cosmos of coffee out there.
Contrary to popular belief, one should grind beans within a half hour of brewing.
Your grind should come out somewhere in the range of sea salt or the recognizable pink salt from the Himalayas.
Make sure you have some filters on hand as well as a heat source.
Grab a kitchen thermometer for exact measurement.
A little bit of string wouldn’t hurt either.
One technique is to make a coffee bag, similar to that of your typical steeping bag for teas.
 I’ll call it the college dorm technique:
- Using your heat source, get water up to a boil and then remove so it can come down to the appropriate temperature.
- Grab two tablespoons of coffee grounds for every 250 ml of water you intend to drink and place them in the center of your filter.
- Now construct a makeshift tea bag by closing the flowered edges of the filter with your string, or by hand (though that could get tiresome). I’ve used the string from a bag of Lipton tea for ease.
- Steep that bag in your coffee cup with your now optimal temperature water.
Be careful as to not let grounds escape from the top of your bag.
When you’ve finished steeping:
- 2-3 minutes for weaker coffee
- 4-5 will get retrieve a stronger, bolder taste
Give the coffee bag a bit of squeeze to get the remaining coffee juices out of the grounds and into your brew.
Don’t Have Any Filters?
Don’t fret. You can still make a great cup of coffee.
This technique is called the Pour-over.
Pay attention though, because the defining feature here is the “steep” time.
- Heat up some water until it reaches the boiling point and then let sit.
- As the water comes down to temperature, gather you coffee grounds and place the desired ratio into a clean cup.
- Pour in enough hot water to cover only the grounds.
- Let them steep for about forty seconds. This is called the bloom, notice the grounds begin to soften and bubble.
- Now fill your cup and let sit until you’ve reached a preferred taste by following the steeping times above.
You might not be crazy about coffee grounds in your cup either. I have yet to meet someone who is.
With a little bit of finesse, transfer the coffee from one cup to another and the amount of grounds disturbing your morning brew should minimize.
If you’re not happy with the taste of the final product, it could be one of two things:
- The brew time is too long.
- The brew time is too short.
Stove Top Coffee Makers
There are of course stove top coffee makers which use boiled water to make espresso-style coffee.
Reminiscent of percolators, familiar if you’re an avid camper, stove top coffee makers are somewhat rare but have their place in the coffee lover’s arsenal:
- The unique procedure
- A defining taste
- An economical route
These aren’t designed to hold boiling water for long. Like a teapot the user is made aware when boiling is reached.
It’s important to note that once the water reaches boiling point the water is forced upwards through the coffee by the pressure it generates.
Be cautious because you can’t hold it safely at boiling point, so it doesn’t really serve as a better solution to keeping water at boiling point.
Boiling water can be useful for a variety of thing around the house, but it’s best to just leave your coffee maker out of it. These well calibrated appliances are far more useful for creating delicious brews than cleaning (or making ramen).
Can You Use A Coffee Maker to Boil Water?
Coffee machines are designed to heat water. Without that function, making coffee would be significantly more difficult.
As we all know the water used to make coffee is super hot but do coffee makers actually boil the water?
And for that matter, how do they heat water so fast anyway?
Lets explore these simple questions in depth.
First, what you may or may not know already is that all drip coffee makers have a heating element in them that does indeed bring water to boiling temperature in the inside of the machine… but it doesn’t release boiling water from the shower-head!
The water is boiled in the heating coils near the bottom of the units and steam rises to the top condensing into water that is slightly less than boiling temp. This is when it drips out of the machine and when we see it.
There’s so much more to understand however so let’s first look at how automatic drip coffee makers work in the first place.
How Coffee Makers Heat Water so Fast
Coffee makers let gravity feed water into an aluminum (or copper) heating coil tube located below the water reservoir.
The heating tube brings water to a boiling temperature inside the coil and the steam that forms from this process rises through the upper (usually plastic) tube as steam bubbles upward.
As the bubbles rise towards the shower head at the top the steam then condenses back into hot water in the tube and is then carried the rest of the way to the top by the newly formed steam bubbles which are still at the bottom closer to the heating coils.
The steam basically carries extremely hot water up the output tube.
Thermo-expansion and steam pressure make all of this work without the use of a water pump which is why coffee makers can last so long and can cost so little.
It’s mostly basic physics that cause these machines work.
By the time the steam condenses into hot water near the top and then drips over your coffee grounds the water is no longer at boiling temperature, it’s usually about 5-10 degrees under depending on your machine… and because of altitude differences (people at sea level will have hotter water at the grind basket than people living at higher elevations) people at higher elevations may easily see water discharging from their coffee makers measuring at only 190-195 degrees.
Unless you are making coffee in a place of negative elevation relative to sea level the temperature of water dripping out of a coffee maker will always be lower than boiling temp but not by much.
Cheaper coffee makers will use a plastic tube for the hot water to rise through and heat will be lost on this journey.
Fancier coffee makers that use an actual pump to pump the water to the top before heating it to boiling will have a slightly hotter water output. SCAA certified coffee makers are designed to output water at the ideal temperature so the return tube may be engineered slightly differently.
No matter what however you aren’t going to get straight boiling water from any coffee maker shower you own or buy off the shelf but it will be extremely close.
To get boiling water you would need a electric water kettle that could heat the water to a full boil and keep it there for use in a french press or pour over coffee dripper.
Warning: Crazy Cool Video Ahead Disassembling a Coffee Maker Heating Element
The mechanics of how a basic coffee maker works is actually very interesting and more in depth than I have summarized above.
Take a look at this Khan Academy video describing how the inner heating coil works in basic coffee makers. You’ll quickly understand how they heat water to a full boil but release water that is slightly under a boil all through the work of basic physics.
The heat level coffee makers typically get to after the water is released from the machine is usually perfect for many things like making tea, coffee, hot chocolate, soups, etc.
Most coffee machines heat the water to between 190-205 degrees depending on altitude but most of them take some time to get this hot because the upper output tube begins at room temperature.
The tube will cause the steam to condense faster resulting in slightly cooler water drips at the very beginning of the brew cycle.
The first water out of the machine is usually the least hot it produces. As the upper tube is heated the steam condenses later and drips out slightly hotter.
How Hot Does the Average Coffee Maker Get?
The average coffee maker that I’ve tested starts pumping water out the shower head way before it heats up all the way.
Some machines I’ve tested start the flow in the 140 degree zone!
Unfortunately most older coffee makers don’t get quite as hot as they did when they were new out of the box because of mineral buildup on the heating element or inner tubes and other internal parts.
Some high end coffee makers certified by the Specialty Coffee Association of America (SCAA) are far more likely top get water up the the 200 degree mark reliably however.
This SCAA certified coffee maker is fairly affordable and very reliable at getting steady temperatures just shy of boiling.
Let’s look into the way a coffee maker heats water up in a little more depth, stick with me for a few.
Are There Benefits to Coffee Maker Maximum Temperatures?
 So there are quite a few good things to having this feature. Some things you would expect and some you might not.
- Saves electricity: boiling water in a coffee machine uses less energy than boiling it on a stovetop would.
- Boiling water this way can save a lot of time as the coffee machine will generally heat up faster than the stovetop.
- You can “technically” sterilize objects in the pot, and since the pot stops at a certain temperature, you need not fear it overheating and scorching the item if it falls to the bottom of the pot.
There are many uses to doing this, and boiling water can save you a lot of time and money, in the long run. I think it is well worth it to use a coffee maker this way.
You can use a stovetop coffee maker to boil water. It will often be a more efficient method than using a regular coffee maker, but it will usually consume more energy and can be dangerous. Make sure the coffee grind chamber is cleaned out, in case the pot boils over. If the pot boils over, it fills all the chambers and the pressure pushes the water out through the coffee grinds area. This can leave a bad taste in the water.
I really recommend that if you are going to sterilize anything, I would recommend using stovetop maker or some other method, as the caffeine could cause issues with sterilizing items like pacifiers or things of the like.
But that said, using it this way does have a few potential drawbacks.
The Downsides
 Now, of course, everything as a downside. It can be somewhat minor or extreme, depending on the situation.
- As I said, you can sterilize items in this, but be wary. If you are sterilizing something like a pacifier or something for a baby, you will want to make sure that the machine has had all of the caffeine rinsed out of it. Caffeine is not a healthy thing for an infant and could cause you an unnecessary nightmare.
As I said earlier, it would be better to use a stovetop maker if you are going to sterilize something in it. If you don’t have one you can just use a pot. I would recommend this because a pot typically won’t have the residual caffeine in it like a coffee maker.
If you are going to use a regular coffee pot for this, I would recommend using a descaler like the De’longhi EcoDeCalk, to clean it out and ensure there’s no leftover caffeine in the machine, so you don’t have to deal with a nightmare later on.
Coffee And Water Temperature
Generally, the ideal temperature is about 190-195 degrees Fahrenheit. This temperature is roughly 12 degrees below boiling point. Most coffee makers aim for this temperature area and tend to stay in it. For most applications, heating water at this temperature will suit what you need, just fine. You may need something slightly hotter, and for that, I would recommend using a stovetop coffee maker.
So, given that it only takes a minute or two for boiling water to cool to coffee machine temperatures, unless you need to maintain a boil or you need the water to be actually bubbling, then the water from your coffee machine is likely to fit most purposes. It’ll make a cup of tea fine or dissolve almost anything that boiling water will.
When You’ll Need Boiling Water
There are some jobs most coffee machines wouldn’t do well. If you’re trying to sterilize anything, that task definitely requires boiling water. However, most things wouldn’t be a good idea to put into a coffee maker to sterilize. The residual caffeine in the machine can “contaminate” whatever you’re trying to sterilize if you don’t clean it out properly. If you’re using the water to make a sauce or soup that needs to thicken, then boiling that and doing so for longer would give you best results too.
While using a coffee maker to boil stuff definitely has its own time and place, sterilization and soup may not be the best usage.
StoveTop Coffee Makers
There are a multitude of upsides and downsides to boiling water on stovetop coffee makers. Stovetop coffee makers can indeed boil water, as anything you put on a stovetop can. They are a great method for boiling water, as the closed chamber heats up much quicker inside. This allows the coffee maker to provide a quick source for boiling water.
The downside to boiling it this way is you REALLY have to be careful. The coffee chamber is directly above the water chamber. Since the water boils up so quickly, it can quickly boil over into the coffee grounds chamber and out over the top. The pressure that builds up in the coffee maker forces the water out to prevent the coffee maker from bursting. So while it can be a good method, if not watched, it can quickly go awry.
If you intend to boil water on a stovetop and don’t want to risk it. I wouldn’t recommend using this and, instead, I would use a regular pot or something similar to avoid mishaps.
So are Coffee Makers a Good Method to Boil Water?
Overall, a coffee maker can produce water that will suit most needs you have for hot water. However, it is not the most efficient way to achieve what you’re trying to do. So, unless you are doing something along the lines of making tea or instant coffee, there are many other methods and other equipment you could use to achieve a better, and more efficient, result.
As I said earlier, cleaning out your coffee maker before doing anything else is rather important. While it’s certainly possible to use a coffee maker to boil things and make hot water, it is far from the most efficient method to do so and is often not worth it.