The Aeropress is a portable coffee brewing device. It uses air pressure to force hot water through coffee grounds, resulting in a smooth and rich cup of coffee.
The Aeropress differs from other brewing methods with its unique combination of pressure and immersion, producing a quick, smooth, and versatile cup of coffee, often with lower acidity and minimal sediment. It’s portable, easy to use, and offers control over various brewing variables.
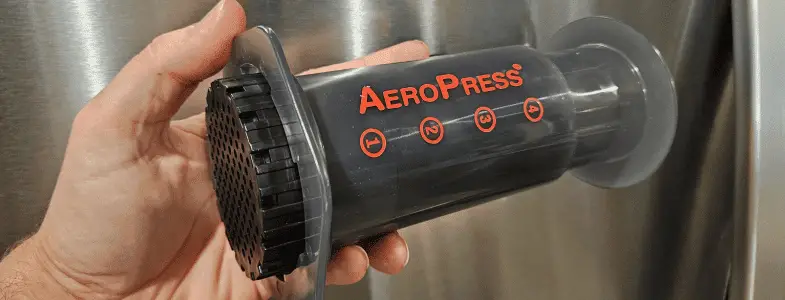
The Original Brew Method – Very Basic
All you need to do is to grind coffee, place in Aeropress, add hot water, stir, attach filter cap, then press the plunger down to extract coffee. Quick and simple coffee in a couple minutes.
Start by grinding coffee beans (medium-fine texture). Put coffee grounds in the Aeropress, add hot water, and stir. Attach the filter cap, steep for the desired time (typically 1-2 minutes), and press the plunger to force the brewed coffee through the filter. The result is a smooth and concentrated coffee that can be enjoyed as is or diluted for an Americano. Cleanup is easy—just remove the cap, eject the coffee puck, and rinse.
If you want to make the best tasting Aeropress coffee possible, with as little fuss as possible, then read on of click this link to jump directly to that section below.
The 4 Main Reasons Why the AeroPress Is So Great
► Versatility: The Aeropress allows for various brewing techniques, accommodating different coffee preferences.
► Portability: Compact and easy to use, it’s ideal for travel or outdoor activities.
► Smooth Coffee: The immersion and pressure brewing method often produces a flavorful, low-acid, and grit-free cup.
► Quick Brewing: The Aeropress typically yields coffee in a few minutes, making it a convenient choice for those in a hurry.
Brewing Basics
Obviously we need to have an Aeropress on hand, coffee beans/grind, and water but aside from those basics let’s look at each factor that goes into the brew.
Notes On Ingredients & Aeropress Equipment
► The Beans: Although you can use pre-ground coffee from a bag you buy at the grocery store you will get better coffee from whole beans you grind yourself. If you can find whole beans that are only 5-10 days past their roasting date then that will be about as perfect as you can get.
► The Grind: Pre-ground coffee tends to fall under the “medium grit” category which is slightly to coarse for an Aeropress. Having said that you can absolutely use medium ground coffee if you want to so long as you understand it will change the extraction to the point where taste will suffer a bit. If you have a home grinder taking the time to adjust the setting down to a medium-fine grind will be best and in some cases you may find flavor improves for certain roasts if your grind size approaches an fine espresso grit size.
► The Water: Any water will make coffee just fine but as anyone who’s ever tasted city tap water can attest the favor of plain water changes from city to city. Some are fine, few are amazing, and many taste particularly bad. If you want good tasting coffee every time find a bottled or filtered water source that you like and use that every time. Coffee’s main ingredient is water after all so use water that actually tastes good.
► The Filter: When you buy an Aeropress it comes with a pack of Aeropress branded filters to get you started. Much like the water the paper filters impart flavor on the coffee as well. Most people have never tried this before but if you brew plain water through a paper filter and then taste the water you’ll pickup on the flavors the paper itself imparts on the coffee. Some paper filters taste terrible while others like the premium triple thick filters from Aeisr impart nearly no extra flavor at all.
If you choose any paper filter then you are going to get a cleaner cup of coffee largely free of sediment or oils but if you want your coffee to have more body (and coffee oil) like you’d get in a French press then metal mesh filters work well and there are many brands to choose from and many different micron-sizes to choose from as well. You can even get super-fine reusable filters from companies like Able Brewing that will almost completely block sediment from your cup while still allowing oils to pass giving you one of the cleanest “unfiltered” cups of coffee possible.
Similar to the ultra-fine mesh filters cloth filters can also block the vast majority of sediment from your coffee while still letting some of the oils to pass and they impart zero extra flavor into your coffee whatsoever making them a nice step up from paper. Unfortunately, they require so much more effort to maintain that I don’t think they are advisable to the regular coffee drinking public. You have special interests to use cloth in my opinion.
► The Flow Rate: The last major ingredient isn’t a tangible ingredient, but it is important nevertheless; it’s time, or flow.
We’re not talking steeping time though we’re talking plunger or pressure time. The finer the coffee grind and tighter the filter the slower the plunger will extract coffee into your cup. Conversely the large the grind size and less tight the filtration the faster the plunge will be. If you do use standard paper filters or a high micron size metal filter with medium-coarse grit coffee then the plunge will be much faster meaning you won’t get as much pressure on the brew. It won’t taste the same way or the best way it possible.
Although some people may not notice a difference (or even care), there are small accessories that you can attach to the bottom of the filter designed to add pressure and slow the flow down, eliminating premature drips, and improve flavor extraction.
Notes On Equipment
Aeropress makes a few different brewers for you to choose from.
The Original, The XL, The Clear, and the Go.
Each makes coffee the same way but the brewer is sized and shaped slightly differently for the use of the individual.
The Easiest Way To Make The Best Coffee Possible With An Aeropress
This is my method that I recommend the vast majority of regular coffee drinkers to go for because it doesn’t change the way a morning routine goes down. Most of us are busy and although we want our coffee in the morning it’s not worth the extra time an energy needed to go beyond this method on a daily basis.
- Buy an ultra fine metal reusable filter disk. The regular filters have larger micron sizes so a lot of sediment will get through them. The Able Brewing fine disk has 152 micron size holes almost half that of The Mesh or the Aeropress branded filter screen.
- Buy a flow control filter cap to ensure you don’t brew to fast or experience early drips from the brew chamber. These are reusable so you just buy it once and use it every time.
- Brew only with filtered or bottled water. Just keep a bunch of tiny water bottles in your coffee station and use them for coffee only.
- Heat water to just under a boil in a fancy electric kettle that can hit a temperature and keep the water there. A Good number to shoot for with an Aeropress (assuming a medium-fine grind) is about 195 degrees.
- Buy freshly roasted beans locally from a company that tells you the roasting date. Beans roasted between 3 and 14 days tend to be best. If you buy small bags weekly then you can always use beans that are of the “perfect age”.
- Set your grinder to a medium fine, a few ticks below store-bought medium grind and a few ticks above espresso grind.
- Dampen 2.5 tablespoons of grind in the Aeropress to let it bloom for 15 seconds or so before adding the rest of the water. This releases excess CO2 before the main brew occurs.
- After adding 5-ounces of water lightly stir the grind (I use a butter knife), then place the plunger on the brew chamber to retain heat.
- After 90 seconds pass, lightly swirl or jostle (shake) the Aeropress to break up the ground coffee crust forming on the inside before pressing the plunger down.
- Slowly press the plunger down to extract all the coffee. This should not be done quickly. Slow steady pressure is all that’s needed.
- Remove the filter cap and filter disk from the brewer and compressed puck and rinse it off under warm water
If you do this you will have a nearly perfect cup of Aeropress coffee in less time than it takes most people to get a cup of coffee in their hands.
This won’t give you an award-winning cup of coffee though. To do that you really have to dial in grind size precisely and adjust water temperature and steeping time to the particle size, the bean roast level, the bean source, etc. At this point even grind particle uniformity comes into play and that’s just a point of diminishing returns that most average people don’t need to care about.
If you’d like to see more detailed instructions on dialing in these inputs, then click here to jump directly to that section located a little lower on this page.
But this does bring us to the inverted method or reverse method of using an Aeropress upside-down so as to not always need the flow control filter cap.
The Inverted Method (Upside Down)
What’s Important in Making AeroPress Coffee?
Detailed instructions
Coffee Amount
Grind Size
Water Amount & Temperature
Brew time
Pressing The Plunger
Fancy Aeropress Brewing Techniques To Try
Prepare your water and coffee
Prepare the filter
Filter Choice Reusable/Paper
Bloom and Stir
Pressure Applied
Cleanup & Maintenance
Frequently Asked Questions
What is the ratio of coffee to water in an AeroPress?
A typical Aeropress coffee ratio is 1:15, one part coffee to 15 parts water, for a balanced extraction, optimal flavor, and a smooth brew. This equates to roughly 15 grams of grind for every 150 grams of water. Keep in mind that one tablespoon of regular medium ground coffee is approximately 6 grams so you would need roughly two and a half tablespoons of ground coffee for every 150 grams (5.07 oz) of water.
How many scoops of coffee do you put in an AeroPress?
The number of coffee scoops for an Aeropress can vary based on personal preference, coffee grind size, and the strength desired. A common starting point is using 1 to 2 scoops of coffee (around 14-30 grams) for a standard cup, but you can adjust according to taste preferences. It’s recommended to experiment with the amount of coffee to find the perfect strength for your liking.
How long should coffee sit (steep) in AeroPress?
The steeping time for coffee in an Aeropress is typically around 1 to 2 minutes. However, this can be adjusted based on personal preference. Shorter steeping times tend to result in a brighter and less extracted cup, while longer steeping times may intensify the flavors. It’s recommended to experiment with different steeping times to find the duration that suits your taste preferences best.
Are you supposed to dilute AeroPress coffee?
Whether to dilute Aeropress coffee depends on personal preference. The Aeropress method often produces a concentrated brew. If you prefer a stronger, espresso-like coffee, you may not need to dilute. However, many people dilute the Aeropress coffee with hot water to achieve a milder flavor, similar to a traditional drip coffee. Experiment with different ratios to find the strength that suits your taste.
Is Aeropress coffee similar to espresso?
Aeropress coffee shares similarities with espresso, such as concentration and the use of pressure, but they differ in key aspects.
Espresso machines produce significantly higher pressure and require a very fine grind, resulting in a quick extraction. In contrast, the Aeropress uses manual pressure, offering more flexibility in grind size and a longer brewing time.
While Aeropress coffee can exhibit some espresso-like qualities, including a concentrated flavor, it tends to be less intense.
The Aeropress’s versatility allows for experimentation, making it a popular choice for those seeking a customizable and unique coffee experience, distinct from the traditional characteristics of espresso.
What is the best grind size for AeroPress?
The ideal grind size for AeroPress is medium to fine, resembling the texture of table salt. This grind size allows for a balanced extraction during the short brewing time. However, personal preferences can vary, so it’s worth experimenting with different grind sizes to find the one that suits your taste.
If the grind is too coarse, the extraction may be underwhelming, while too fine a grind might result in a difficult press and over-extraction.
Adjust the grind based on your desired brewing time, darkness of the roast, and the flavor profile you desire, keeping in mind that the AeroPress is quite forgiving and allows for flexibility in grind size.
Aeropress Accessories That You Need To Know About
Aeropress metal filters come in a variety of micron sizes. The tighter mesh screens give you coffee that has less sediment much like a paper filter used in drip coffee. If you want a full-bodied cup of coffee complete with some sediment and oils then a higher micron size screen can be used in conjunction with a flow rate regulator to ensure coffee doesn’t drip out early.
Fancy paper filters can be used to improve cleanliness of the cup and to minimize paper flavor while some premium filter holders can be purchased to not only hold but protect your paper filters and device.