Sometimes you have a problem with a Keurig that can only be fixed by taking the machine apart.
Sometimes you’ll find that doing a deep clean of a Keurig also requires opening up part of the machine.
I know it’s a pain but it’s better to do this than it is to trash the unit and buy a new one. And sometimes disassembly and DIY repair can resolve your problems a lot faster than going through the warranty process.
If you want to learn how to disassemble a Keurig, then read on.
I’ll be giving you all the tips you need to get yours taken apart correctly and put back together as quick as possible.
Also, if you are planning on taking your Keurig apart to descale it or to deep clean it then make sure to check out our dedicated guide to cleaning your Keurig right here.
How to Take Apart Keurig Coffee Makers
Before we dive deep, lets first watch a quick video on how to disassemble Keurig machines.
Thanks to http://www.keurigtroubleshooting.com/ for putting together this awesome tutorial.
First things first, you have to take off the water reservoir and drip tray. These are made to come off easily, as you no doubt know quite well already. You can also pull the k-cup holder out by hand without the use of any tools.
With those easy parts out of the way, the first hard thing to do is to remove the casing from your Keurig. We do that by first flipping the machine upside down and using a screwdriver to take the screws out of the base plate.
Shoutout – Keurig vs Nespresso: Which one is Better
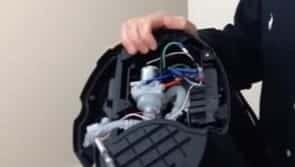 With the screws off, the bottom can be removed, except it’s got some wires holding on to the inside of the machine. To do any serious repairs inside the housing you will have to cut these wires while leaving enough room to repair your cuts when it comes time to put your Keurig machine back together. Safety note: Make sure your machine is unplugged if you are cutting the wires.
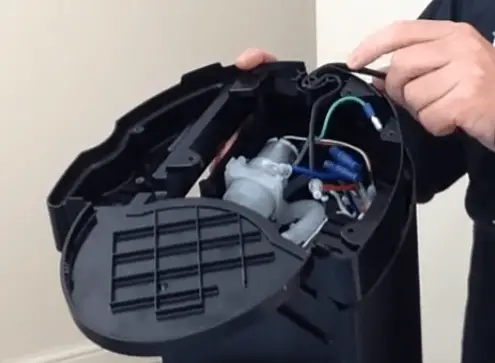
Once the bottom is fully removed you will have access to the water pump and tubing that immediately connects to the water reservoir at the bottom. You’ll also note that even if the water pump is working properly there is a pretty LED light in this section of tubing that illuminates the water reservoir. If this light goes (or more likely the wiring that operates this light shorts) then this is the section of tubing that would need to be replaced or the wiring should be repaired.
Continue Removing the Keurig Base
The next part involves removing another group of screws. There are four screws surrounding the main water pump holding the rest of the bottom of the machine together. Remove these screws and the two holding the end of the water pump tubing.
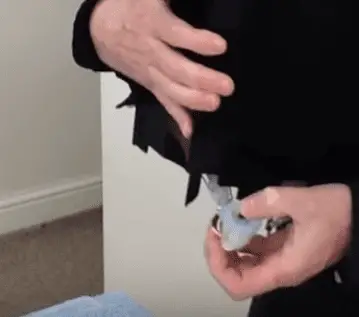
With these screws removed, the bottom of the Keurig can be slowly lifted off. Just be careful to not pull the water pump tubing too hard, as it is still connected to the body. You will also have to carefully deal with the power cord which is still connected to the base. Just pop the power cord out of where it clips to the base and slide the base off.
Take Apart the Top of a Keurig
Once the bottom of the Keurig is fully removed, the next step in disassembly is to take apart the top where the K-Cups are inserted.
If you open the top up as if you were going to insert a k-cup you will find some more screws that need to be removed. There are two on either side of the needle and one on each side of the handle. By removing these screws you will be able to take the handle off your Keurig relatively easily.

Once you get the proper screws removed you can then gently lift the handle and lid directly off the top of the unit. You may need to slightly close the lid to lift of off both pieces at the same time. Once removed, the lid and the handle can be separated easily.
This is what the top of your Keurig should now look like after you’ve removed the handle.

When you get the handle removed from the top of your Keurig, you will next need to grab a hex screw driver to remove two more screws inside the top assembly.

Open up the Body of Your Keurig Machine

With the base removed and the top of your Keurig pulled apart, we next move on to the disassembly of the body casing. For this job, you must be prepared to slightly damage some of the interior plastic. It’s almost inevitable.
To remove the silver top plate of your Keurig from the black plastic body, you’ll need to flip your machine upside down and use a long-shafted tool like a flat-head screwdriver to pop three plastic clip hinges apart. These clips hold the top plate to the body and can’t be reached effectively without going in from the bottom. They will likely be damaged when you separate them, but this will not be evident from the outside when you put the unit back together.
The first clip you will work on will be the inside clip located under the LCD screen where the silver top casing meets the black body casing. You’ll need to insert your long-handled flat-head onto the right spot of the clip and use a hammer to pop the clip apart.
The second and third clips are located roughly on the back “corners” of the body. Understand that the back is curved, but if it was squared they are located roughly where the corners would be.

Use your long-handled tool and a hammer to pop these two clips off and the grey or silver top plate should be able to separate from the black body with as little internal damage as possible. In most cases you can do this carefully enough to keep the internal damage low enough to get these clips to go back together just fine when you put everything back together.
As an example of what you are looking for, here is what the clips look like in the body once you get it off.

That’s it! At least, that’s how to open up a Keurig machine and get to the guts inside. Of course, there are lots of additional disassembly procedures beyond this to get to various parts that may be malfunctioning, but that should get you started.
As I add posts to this site on fixing other components inside a Keurig, I’ll link to them from this page.
Good luck with your repair but if you think you need to finally buy a new unit then make sure to see my recommendation list for the best Keurig machines sold today.
Here is the Disassembly of a Keurig 2.0 Machine
The tutorial above should help with the disassembly of most Keurig machines, but in case you want to see an extra example, check out this bonus video on taking apart a Keurig 2.0.
How to Repair the Wires Inside a Keurig Coffee Maker
Here are a couple pictures of what you need to do to fix wiring problems inside your Keurig. You will basically need to cut damaged wire sections and solder then back together again.
If you fully remove the bottom from your keurig machine, then you will have to cut these wires. Using a soldering gun and a heat shrink will let you safely put them back together again when it comes time to reassemble your Keurig machine.


Lastly, it’s worth saying a little something else.
Most people will never have to do all of this even if they want to deep clean or descale their Keurig. We have a guide right here that shows exactly how to properly deep clean your machine. Check it out.